Milk Kefir FAQ | Equipment & Supplies
Table of Contents
- Do I Need to Buy a Special Starter Kit, or Can I Use Things From My Kitchen?
- What Supplies Do I Need for Making Milk Kefir?
- Is a Thermometer or Heating Mat Necessary for Making Kefir?
- Is a Stainless Steel or Nylon Sieve Better for Making Milk Kefir?
- What Milk Is Best For Making Milk Kefir?
- Do I Need a Special Lid, Such as One With a One-way Valve?
- Should I Ferment With a Lid Or With a Teatowel/Cheesecloth and a Rubber Band?
- Can I Use a Cheesecloth or Coffee Filters to Strain Milk Kefir Instead of a Sieve?
- Can I Use a Mesh to Strain Milk Kefir?
- What Size Jar Should I Use for Making Milk Kefir?
- Can I Ferment Kefir in Plastic Containers Instead of Glass?
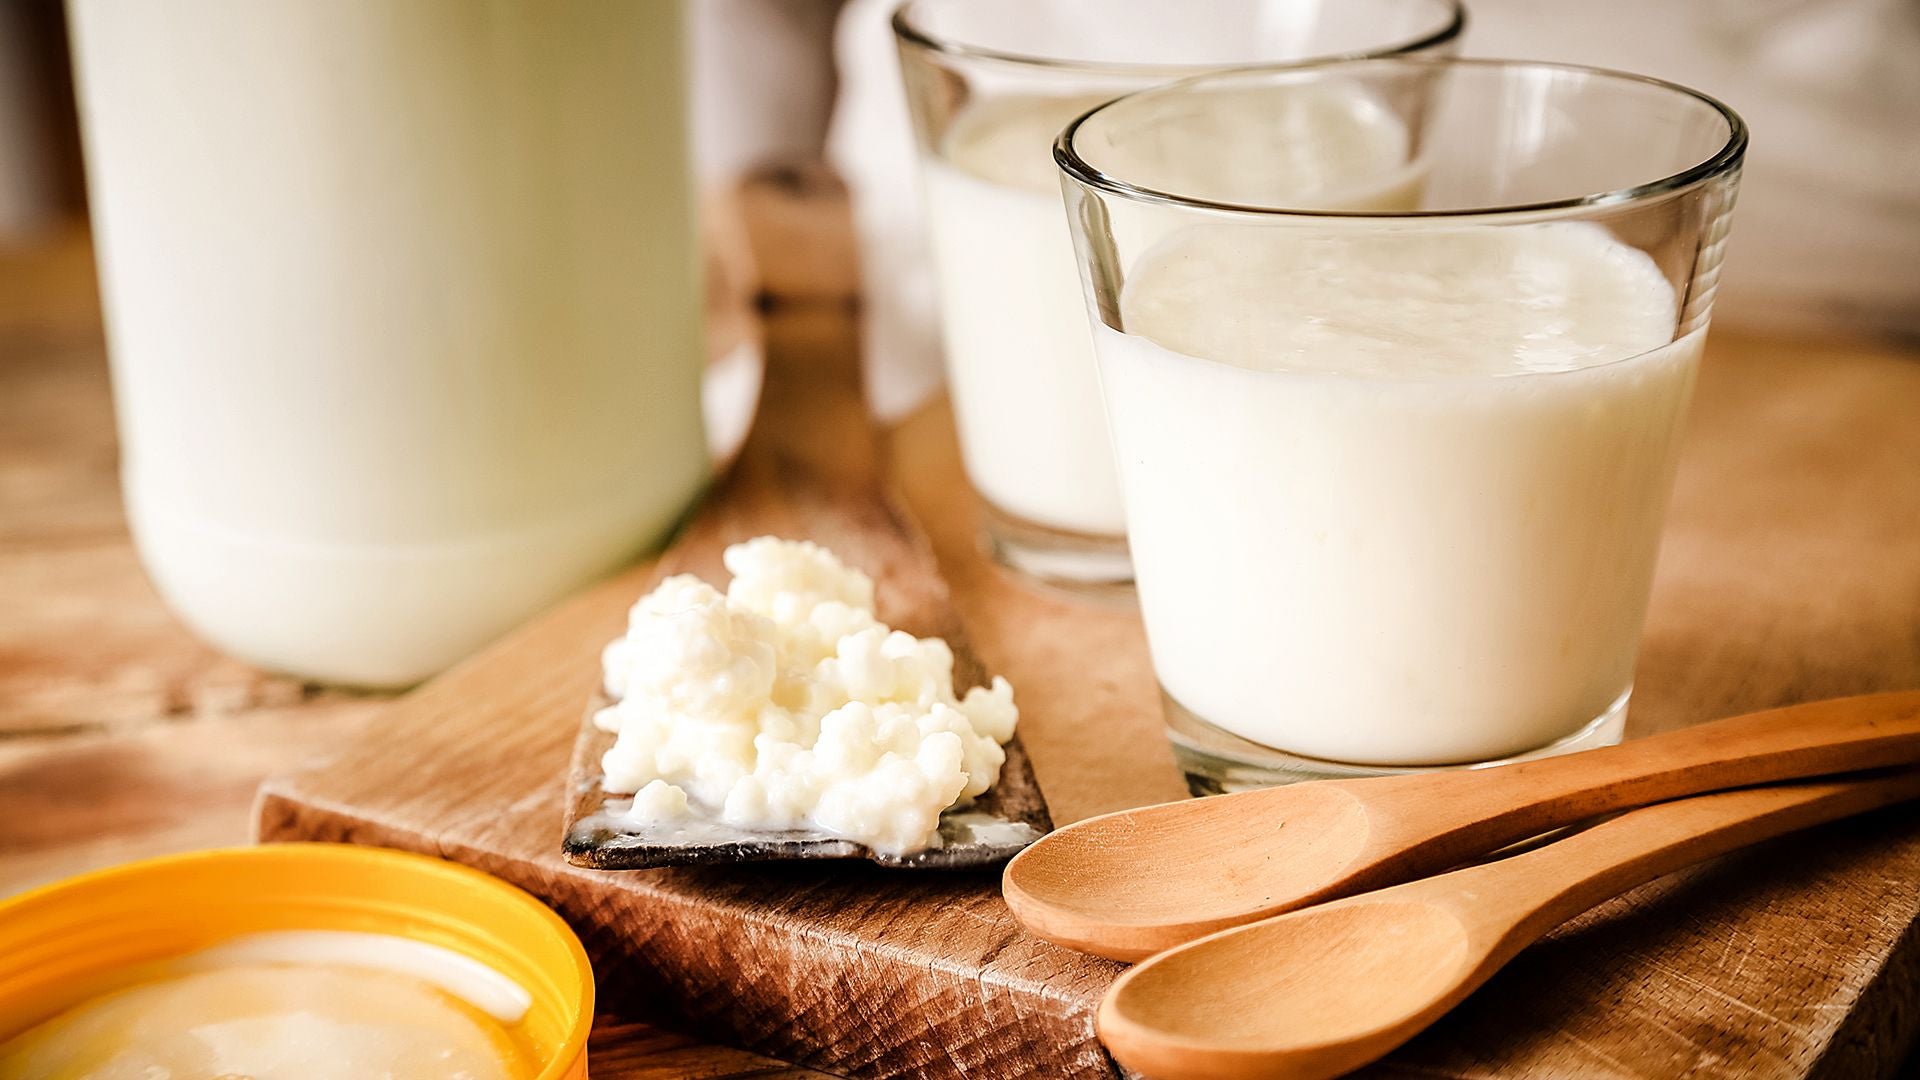
- Can I Use a Wooden or Bamboo Spoon Instead of Metal?
- What's the Best Type of Bottle for Storing Finished Kefir?
- Can I Use an Electric Yoghurt Maker/Fermentation Device to Make Milk Kefir?
Do I Need to Buy a Special Starter Kit, or Can I Use Things From My Kitchen?
While specialist tools can be nice to have, they're not essential, and there is a strong chance that you already have everything you need in your kitchen to make milk kefir. We explore this more in the question below.
What Supplies Do I Need for Making Milk Kefir?
Making milk kefir is not complicated, and you only need a few common household materials:
A Fine Mesh Stainless Steel or Nylon Sieve
On the small side, grains can be as tiny as 2mm, but most sieves have holes smaller than this, which prevents the grains from being pushed through during straining. Do not use a colander to strain your grains, as the holes are normally too large. Conversely, an unnecessarily fine mesh can increase your straining time.

Picture of various-sized strainers: The far left sieve is the finest mesh. While it works, it is slower than the middle sieve, which does the same job. The colander on the far right is too coarse for straining.
A Spoon, Silicone Spatula, or Slotted Nylon Spoon
A standard spoon or a silicone spatula is a great choice, but a spatula can make straining a bit easier for large batches compared to a smaller spoon.

However, we have found great success for both smaller and larger batches with something that we haven't seen elsewhere – a slotted nylon spoon, like the one pictured here.
By gently moving the spoon in a circular motion over the grains, you can more quickly push the milk curds and liquid through the strainer compared to other methods, with no downsides.
A Glass Jar
A glass jar makes for a great brewing vessel as it's inert, easy to clean, and allows you to easily view the fermentation and judge how far along it is.
Milk Kefir Grains
Here in Australia, live milk kefir grains cannot be found in stores like Coles and Woolworths, and the vast majority of health food stores. This is also the case worldwide, as kefir grains are a live culture that needs to be attended to; so, they're normally only available through specialised sellers. Grains can be sourced locally, but quality, proper handling, and support given can vary greatly.
This is where we come in. For over half a decade, we have been selling high-quality, organic milk kefir grains all across Australia, from major cities such as Perth, Melbourne, Sydney, and Brisbane to all smaller regional areas through the internet. Every order comes with premium kefir grains, instructions and recipes, and expert email support (if needed), to help you have the best experience possible when entering the world of fermentation.
Milk
Full-cream milk is king, but lite or skim milk is also a good choice. It is also possible to use other types of milk, such as goat and sheep's milk, or even plant-based milk. If you use plant-based milks, you do need to refresh the grains with dairy milk every few batches, but preferably every 2nd batch.
A Bottle
If you don't drink your milk kefir immediately after straining, you can bottle it and store it in the fridge in a glass or plastic bottle. As a safety note, fermentation can still occur after bottling. To prevent a potential explosion, open the lid of the bottle once every few days.
A Funnel (Optional)
It can make bottling the milk kefir easier.
A Seedling/Reptile Heating Mat (Optional)
If your house gets particularly cold during the winter (under 18°C [65°F]), and you can't find somewhere warm enough to place your jar of milk kefir, like next to a heater or on top of a fridge, you can use a heating mat to help the grains do their job. However, you must take care in ensuring that the fermentation doesn't heat up past 28°C (85°F), as this can start to kill the kefir grains.
If your heating mat doesn't have a temperature control, we recommend:
- Placing the mat 2 cm away from the jar.
- Feeling the temperature of the jar after 4 hours.
- Inching it closer if needed, but not by too much.
- Repeat until you find the sweet spot where the milk kefir is at room temperature – neither hot nor cold.
Many heating mats, even cheap ones, will have a temperature control. In such a case, you can:
- Set the jar of milk kefir on top of the mat (only if the mat is mildly warm at most on the lowest setting).
- Increase the temperature of the mat by a small gradient.
- Feel the temperature of the jar after 4 hours.
- Repeat until you find the sweet spot where the milk kefir is at room temperature – neither hot nor cold.
Note: It can be extremely tempting to move the heating mat closer to the jar in large increments or to increase the temperature control of the heating mat by a large margin. However, it is very easy to take your milk kefir jar from cold to the touch to hot enough to cook your grains – we recommend being patient and proceeding with caution.
Thermometer (Optional)
While you don't necessarily need a thermometer, it can be useful if you think that your milk kefir is regularly outside of the range of 18°C - 28°C (65°F - 85°F) or if you're using a heating mat and are concerned about cooking your kefir grains.
Is a Thermometer or Heating Mat Necessary for Making Kefir?
As we explained above, thermometers and heating mats are only essential for making milk kefir in specific circumstances.
Heating Mat
You should consider a heating mat when:
- Your house is below 18°C (65°F).
- You can't place your milk kefir somewhere warm, like next to a heater or on top of a fridge.
Thermometer
You should consider a thermometer when:
- You are unsure if your milk kefir is getting too hot or too cold.
- When you are using a heating mat and want to ensure that your grains don't get too hot.
Is a Stainless Steel or Nylon Sieve Better for Making Milk Kefir?
While both are great options, we would say that metal sieves are the winner due to their availability, durability, and lack of microplastics. Here's a full breakdown:
Metal Sieves
-
Increased Grain Breakage
- Due to the hardness of the metal, a metal strainer can break up your grains into smaller grains during straining, particularly if you're straining fast and roughly. While some people would prefer to grow larger grains, it is more of a personal preference/a cosmetic issue than a practical one; in fact, smaller grains do have a slight edge in productivity due to their increased surface area, relative to mass.
-
Isn't Metal Harmful to Kefir Grains?
- No, it is not: there is a persistent myth that all metals can harm kefir grains – this is not an issue with stainless steel, as it's an inert metal.
-
Availability and Durability
- Metal sieves are very durable if treated right, and you likely already have one in your kitchen, ready for use.
Nylon Sieves
-
Growing Large Grains
- As nylon is softer than metal, you don't have to worry about grain breakage during straining, allowing for larger grains to be grown. But as said above, growing larger grains is a preference, not a practical issue.
-
Microplastics
- If microplastics are a concern to you, either due to health or environmental reasons, we would recommend considering a metal strainer.
-
Availability and Durability
- Nylon sieves are harder to find in stores, and it's unlikely that you already have one.
- They are prone to damage by sharp objects and are less durable, meaning that you'll have to replace them more often than a metal strainer.
What Milk Is Best For Making Milk Kefir?
Full-cream milk is the top choice for making milk kefir, thanks to its richness and flavour. Lite and skim milk also work well. Below is a quick summary.
Best Milk Types for Kefir
Full-Cream Milk
- Produces the thickest and creamiest kefir with the best flavour
- Inexpensive and widely available.
Lite or Skim Milk
- Results in a lighter, less creamy kefir, but still delicious.
- Inexpensive and widely available.
You can also use A2, organic, unhomogenised, or raw versions of these milks for kefir if you prefer a more natural or specialty option.
Do I Need a Special Lid, Such as One With a One-way Valve?
You don't need a special lid to make milk kefir, unlike some other fermentations, like alcohol brewing, which utilise a one-way valve to allow gases to escape without oxygen entering the brewing vessel.
Should I Ferment With a Lid Or With a Teatowel/Cheesecloth and a Rubber Band?
In our milk kefir instructions, we state that you should 'loosely place/twist on the lid, allowing for airflow.' However, some people do something different – they use a cheesecloth or a teatowel as the lid for their fermentation by securing it to the mouth of the jar with a rubber band.
There isn't a huge difference between these two options, but we have chosen the lid method as it has a few small advantages and no real disadvantages. Here's a breakdown of the two options:
Using a Lid
Simply place the lid on the mouth of the jar loosely. This allows for gases to escape while keeping out insects and dust. A lid is also very easy to clean, only needing to be rinsed with water.
In summary, a lid:
- Keeps out insects and dust well.
- Is convenient as you can use the lid that the jar comes with.
- Is easy to clean.
Cheesecloth or Teatowel
You can also use a cheesecloth or a teatowel for your fermentation by securing one to the mouth of the jar with a rubber band. This allows for oxygen to be exchanged with the gases released during fermentation. However, there isn't a huge difference in anaerobic/closed lid (without oxygen) or aerobic/open lid (with oxygen) fermentations.
It is also more trouble to clean a teatowel or cloth if milk kefir gets splashed onto them, and to find or replace a rubber band if it snaps. But most importantly, fruit flies have been known to wiggle in through the weaves of thin cheesecloths and enter the brewing vessel, which we haven't seen with the lid method.
In summary, using a cheesecloth or a coffee filter:
- Doesn't provide the same degree of protection against insects when compared to a lid.
- Is harder to clean.
- Less convenient if you don't have the materials at home.
Can I Use a Cheesecloth or Coffee Filters to Strain Milk Kefir Instead of a Sieve?
No, we wouldn't recommend using a cheesecloth or a coffee filter in place of a sieve for the following reasons:
Cheesecloth
- Needs to be coarse to push the milk curds through.
- Difficult to clean.
Coffee Filter
- It will only filter whey out while leaving the milk kefir grains and milk curds behind.
- It is liable to tear if you use a spoon to agitate the mixture during straining.
Can I Use a Mesh to Strain Milk Kefir?
Some people have had success using a pliable mesh, such as in this popular YouTube video, where the creator and commenters state that they have found it's faster and easier.
We have tried this method, and in our opinion, using a mesh is:
- Not significantly faster.
- Harder to clean in a dishwasher than a strainer.
- More difficult to use for straining larger batches than a sieve.
In our opinion, it is possible that the commenters haven't developed their straining technique yet, or that they don't have a suitable strainer and spoon. But by all means, give it a go if you're interested! Just ensure that your mesh is nylon or another food-grade material, not fibreglass, like what was used in the video.
What Size Jar Should I Use for Making Milk Kefir?
That depends on how much milk kefir you intend to make! If you want to make one to two cups of milk kefir a day, a good starting point is a jar that's 500 ml to 1 litre in size. This leaves a good amount of headroom at the top of the jar for expansion and stirring, while also leaving you a bit of room for increasing to two cups per day if you start just making a single cup. As your grains multiply, you can increase the jar size or start using multiple jars, if desired.
Can I Ferment Kefir in Plastic Containers Instead of Glass?
While technically possible, we wouldn't recommend it for a few reasons:
- Microplastics.
- Other chemical leaching.
- Difficulty in fully sanitising plastic.
- Plastic containers can have minor scratches that harbour foreign bacteria.
Can I Use a Wooden or Bamboo Spoon Instead of Metal?
You can if you want to, and it is completely safe – although it may be less practical. This is because wood and bamboo is:
- Harder to sanitise.
- Prone to splintering.
- Susceptible to absorbing foreign flavours.
What's the Best Type of Bottle for Storing Finished Kefir?
There isn't necessarily a best type of bottle for storing milk kefir. A simple plastic water bottle is fine if you aren't concerned about microplastics. However, a glass swing-top bottle is a great choice as you can do secondary fermentations with them, further flavouring and carbonating your milk kefir.
As a safety note, keep in mind that fermentation can continue to occur after the milk kefir has been bottled and placed in the fridge. To prevent a possible explosion, you should open the lid once every few days and only fill up the bottle three-quarters of the way (air is compressible, liquids are not).
Can I Use an Electric Yoghurt Maker/Fermentation Device to Make Milk Kefir?
If you already have a yoghurt maker or a similar fermentation device at home, you may be wondering if you can also use it to make milk kefir: the answer is yes, as long as it does not heat past 28°C (85°F), which could harm the kefir grains.
In fact, a consistent temperature is good for the health of the kefir grains and will produce a relatively consistent-tasting milk kefir. It is also great if the temperature of your house is too low for proper fermentation. Although if you do not have one, and especially if you're a beginner, do not feel like you have to immediately go out and buy one – it's a nice thing to have, but it's not essential.